前言 如果你没有接触过Spring Boot , 可以看我的Spring Boot的系列文章: 点击这里
开发环境
idea 2019.1
maven
Spring Boot 2.1.5
jdk 1.8
Win 10
…
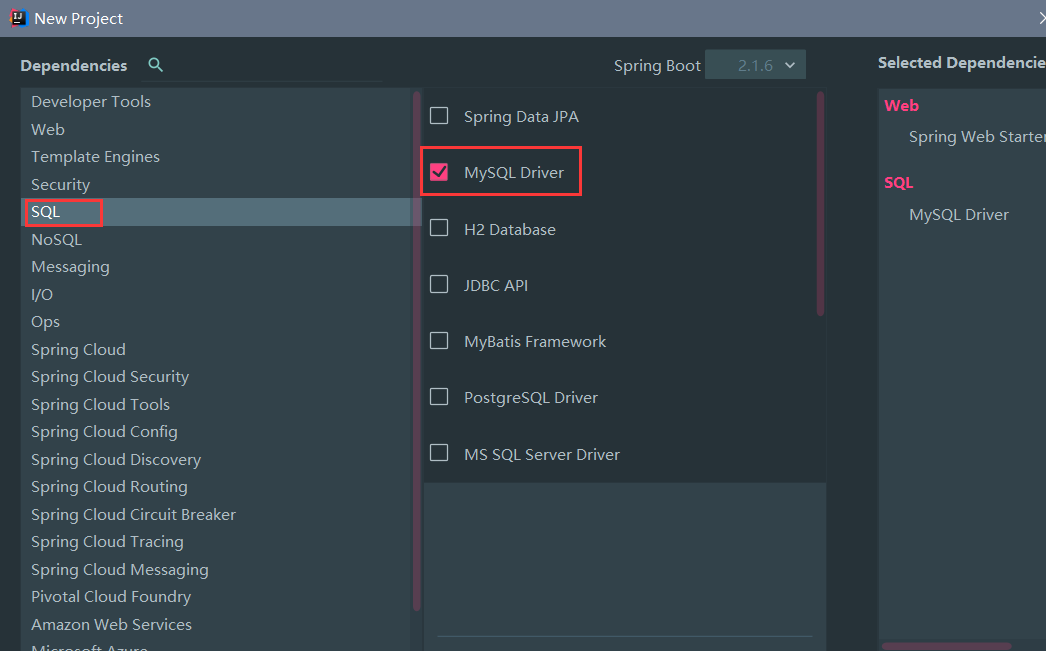
主要依赖 使用 idea 自动化创建Spring Boot项目,这里不再赘述了, 不过需要注意的是, 我们需要把Mysql驱动勾选上:
需要其他依赖, 可以自己勾选;
完整的pom文件:
1
2
3
4
5
6
7
8
9
10
11
12
13
14
15
16
17
18
19
20
21
22
23
24
25
26
27
28
29
30
31
32
33
34
35
36
37
38
39
40
41
42
43
44
45
46
47
48
49
50
51
52
53
54
55
56
57
58
59
60
61
62
63
64
65
66
<?xml version="1.0" encoding="UTF-8"?> <project xmlns ="http://maven.apache.org/POM/4.0.0" xmlns:xsi ="http://www.w3.org/2001/XMLSchema-instance" xsi:schemaLocation ="http://maven.apache.org/POM/4.0.0 http://maven.apache.org/xsd/maven-4.0.0.xsd" > <modelVersion > 4.0.0</modelVersion > <parent > <groupId > org.springframework.boot</groupId > <artifactId > spring-boot-starter-parent</artifactId > <version > 2.1.5.RELEASE</version > <relativePath /> </parent > <groupId > com.carson</groupId > <artifactId > spring-boot-06-data-jdbc</artifactId > <version > 0.0.1-SNAPSHOT</version > <name > spring-boot-06-data-jdbc</name > <description > Demo project for Spring Boot</description > <properties > <java.version > 1.8</java.version > </properties > <dependencies > <dependency > <groupId > org.springframework.boot</groupId > <artifactId > spring-boot-starter-jdbc</artifactId > </dependency > <dependency > <groupId > org.springframework.boot</groupId > <artifactId > spring-boot-starter-web</artifactId > </dependency > <dependency > <groupId > mysql</groupId > <artifactId > mysql-connector-java</artifactId > <scope > runtime</scope > </dependency > <dependency > <groupId > org.springframework.boot</groupId > <artifactId > spring-boot-starter-test</artifactId > <scope > test</scope > </dependency > <dependency > <groupId > log4j</groupId > <artifactId > log4j</artifactId > <version > 1.2.17</version > </dependency > <dependency > <groupId > com.alibaba</groupId > <artifactId > druid</artifactId > <version > 1.1.16</version > </dependency > </dependencies > <build > <plugins > <plugin > <groupId > org.springframework.boot</groupId > <artifactId > spring-boot-maven-plugin</artifactId > </plugin > </plugins > </build > </project >
记得把 druid 连接池添加上, 并且加上 log4j 的依赖, 不加的话等下会报错
开始配置 然后我的配置文件选择 yml 后缀的:
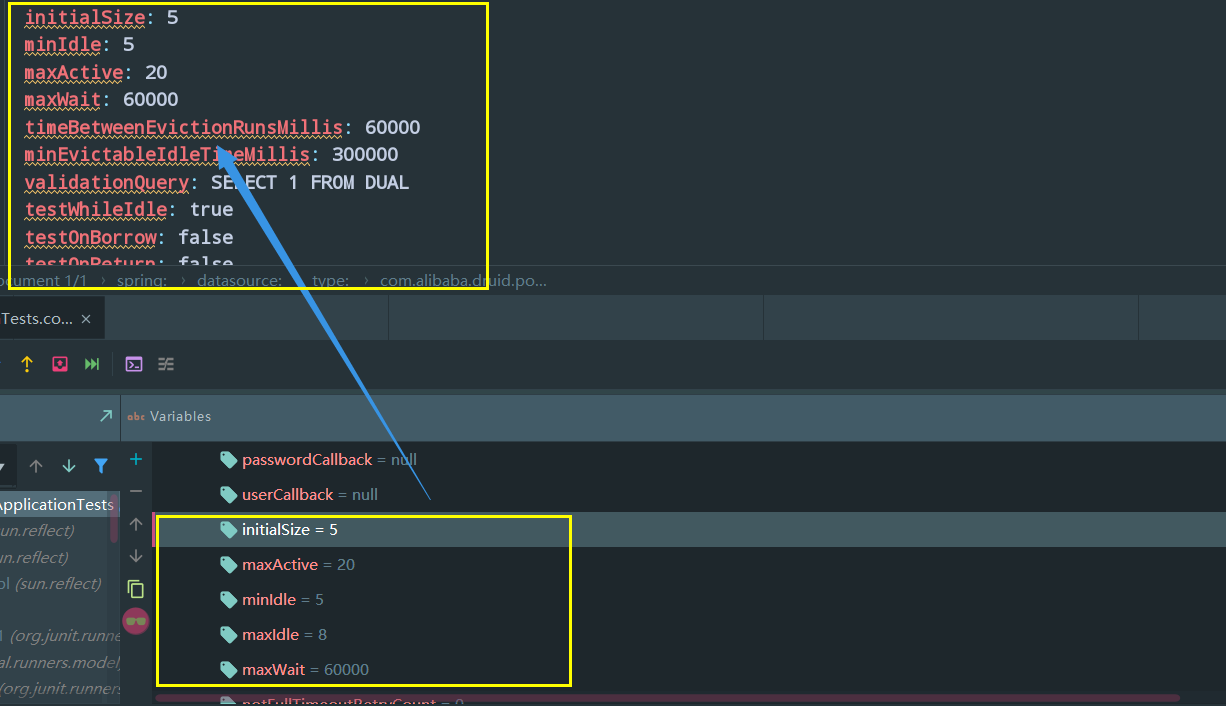
1
2
3
4
5
6
7
8
9
10
11
12
13
14
15
16
17
18
19
20
21
22
23
24
25
26
spring: datasource: password: root username: root url: jdbc:mysql://localhost:3306/ssm?serverTimezone=UTC driver-class-name: com.mysql.cj.jdbc.Driver type: com.alibaba.druid.pool.DruidDataSource initialSize: 5 minIdle: 5 maxActive: 20 maxWait: 60000 timeBetweenEvictionRunsMillis: 60000 minEvictableIdleTimeMillis: 300000 validationQuery: SELECT 1 FROM DUAL testWhileIdle: true testOnBorrow: false testOnReturn: false poolPreparedStatements: true filters: stat,wall,log4j maxPoolPreparedStatementPerConnectionSize: 20 useGlobalDataSourceStat: true connectionProperties: druid.stat.mergeSql=true;druid.stat.slowSqlMillis=500
从分割线以下的配置,是不会生效的, 所以我们等下需要特殊配置一下,
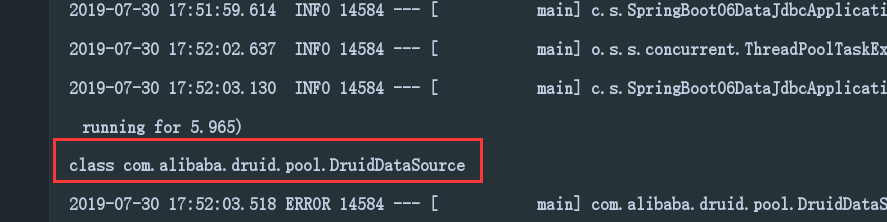
不过让我们先测试一下我们的连接池 是否为 Druid 连接池,
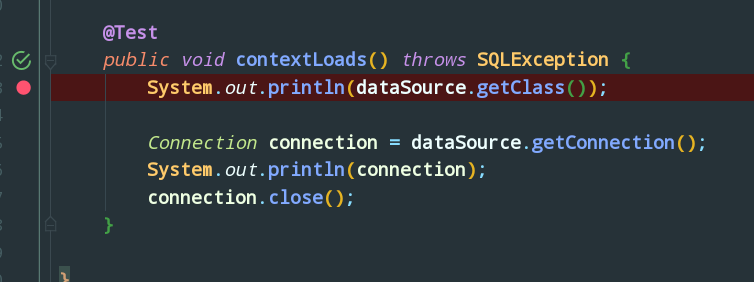
打开我们test包下的测试类, 我这里放上我的完整代码:
1
2
3
4
5
6
7
8
9
10
11
12
13
14
15
16
17
18
19
20
21
22
23
24
25
26
27
28
package com.carson.springboot;import org.junit.Test;import org.junit.runner.RunWith;import org.springframework.beans.factory.annotation.Autowired;import org.springframework.boot.test.context.SpringBootTest;import org.springframework.test.context.junit4.SpringRunner;import javax.lang.model.element.VariableElement;import javax.sql.DataSource;import java.sql.Connection;import java.sql.SQLException;@RunWith (SpringRunner.class)@SpringBootTest public class SpringBoot06DataJdbcApplicationTests @Autowired DataSource dataSource; @Test public void contextLoads () throws SQLException System.out.println(dataSource.getClass()); Connection connection = dataSource.getConnection(); System.out.println(connection); connection.close(); } }
运行此测试你将会看到控制台输出的连接池类型:
正是我们需要的连接池类型
还记得刚才说的不生效的那些配置吗? 现在让我们来设置一下;
首先创建一个config配置类:
1
2
3
4
5
6
7
8
9
10
11
12
13
14
15
16
17
18
package com.carson.springboot.config;import com.alibaba.druid.pool.DruidDataSource;import org.springframework.boot.context.properties.ConfigurationProperties;import org.springframework.context.annotation.Bean;import org.springframework.context.annotation.Configuration;import javax.sql.DataSource;@Configuration public class DruidConfig @ConfigurationProperties (prefix = "spring.datasource" ) @Bean public DataSource druid () return new DruidDataSource(); } }
@ConfigurationProperties: 前缀, 表示带这些前缀的配置生效
然后在测试类打个断点,debug运行一下:
结果:
可以看到属性是正确的
配置Druid监控 1) 配置一个管理后台的Servlet 依然是刚才的 DruidConfig 配置类,我们来添加以下方法:
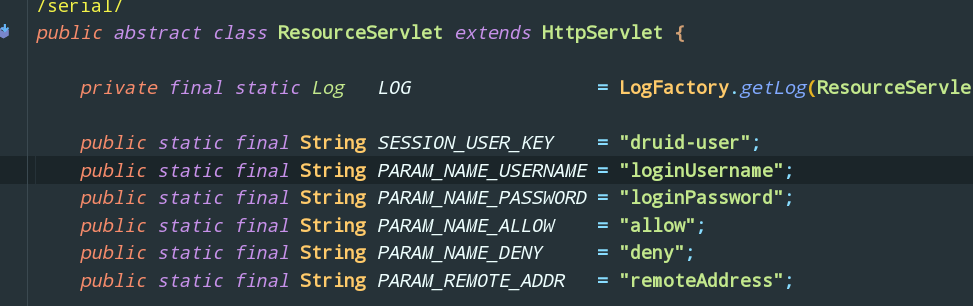
1
2
3
4
5
6
7
8
9
10
11
12
13
14
15
16
17
18
@Bean public ServletRegistrationBean statViewServlet () ServletRegistrationBean bean = new ServletRegistrationBean (new StatViewServlet(), "/druid/*" ); Map<String, String> initParams = new HashMap<>(); initParams.put("loginUsername" , "admin" ); initParams.put("loginPassword" , "123456" ); initParams.put("allow" , "" ); initParams.put("deny" , "192.123.11.11" ); bean.setInitParameters(initParams); return bean; }
这些参数是从哪里来的呢? 就是下面:
2)配置一个监控的 filter 1 2 3 4 5 6 7 8 9 10 11 12 13 14 15 @Bean public FilterRegistrationBean webStatFilter () FilterRegistrationBean bean = new FilterRegistrationBean(); bean.setFilter(new WebStatFilter()); Map<String, String> initParams = new HashMap<>(); initParams.put("exclusions" ,"*.js,*.css,/druid/*" ); bean.setInitParameters(initParams); bean.setUrlPatterns(Arrays.asList("/*" )); return bean; }
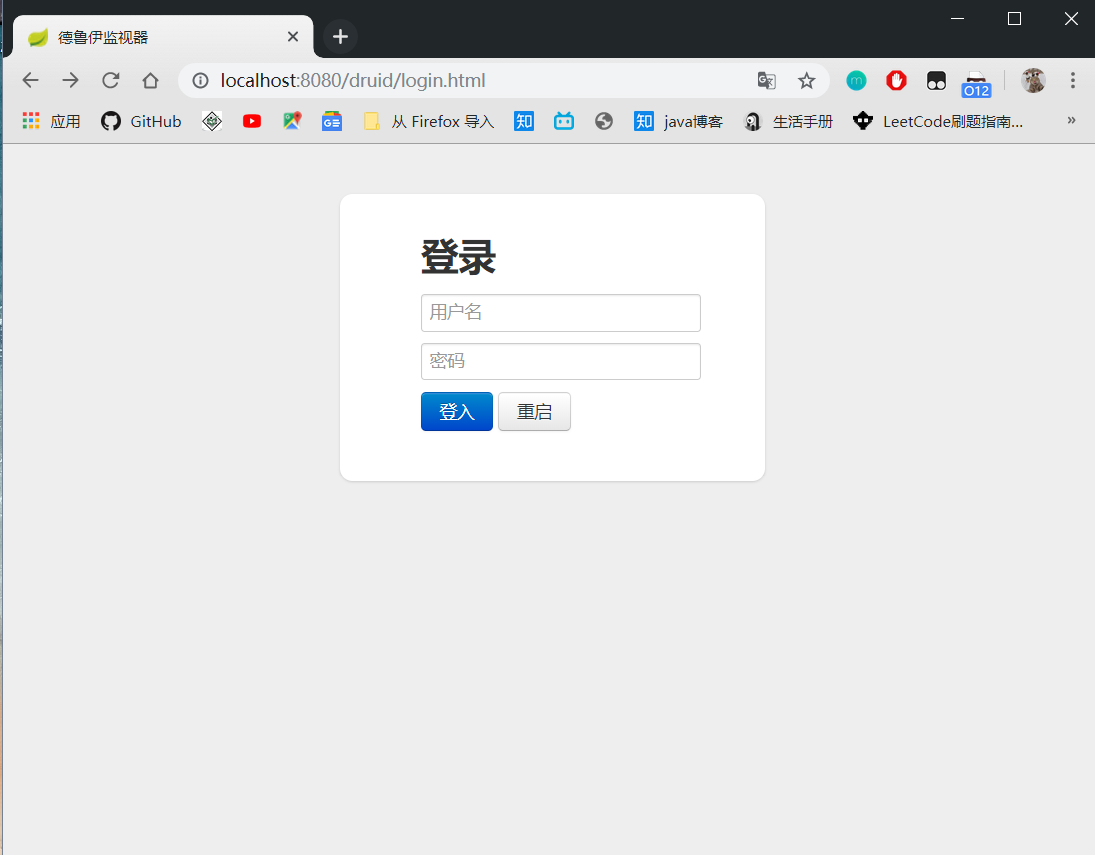
设置好这个,我们可以启动Spring Boot的主类, 然后访问 德鲁伊(Druid)监视器: http://localhost:8080/druid
这个路径是druid默认的路径, 你会看到一个登录页面:
密码就是我们刚才设置的 admin 和 123456
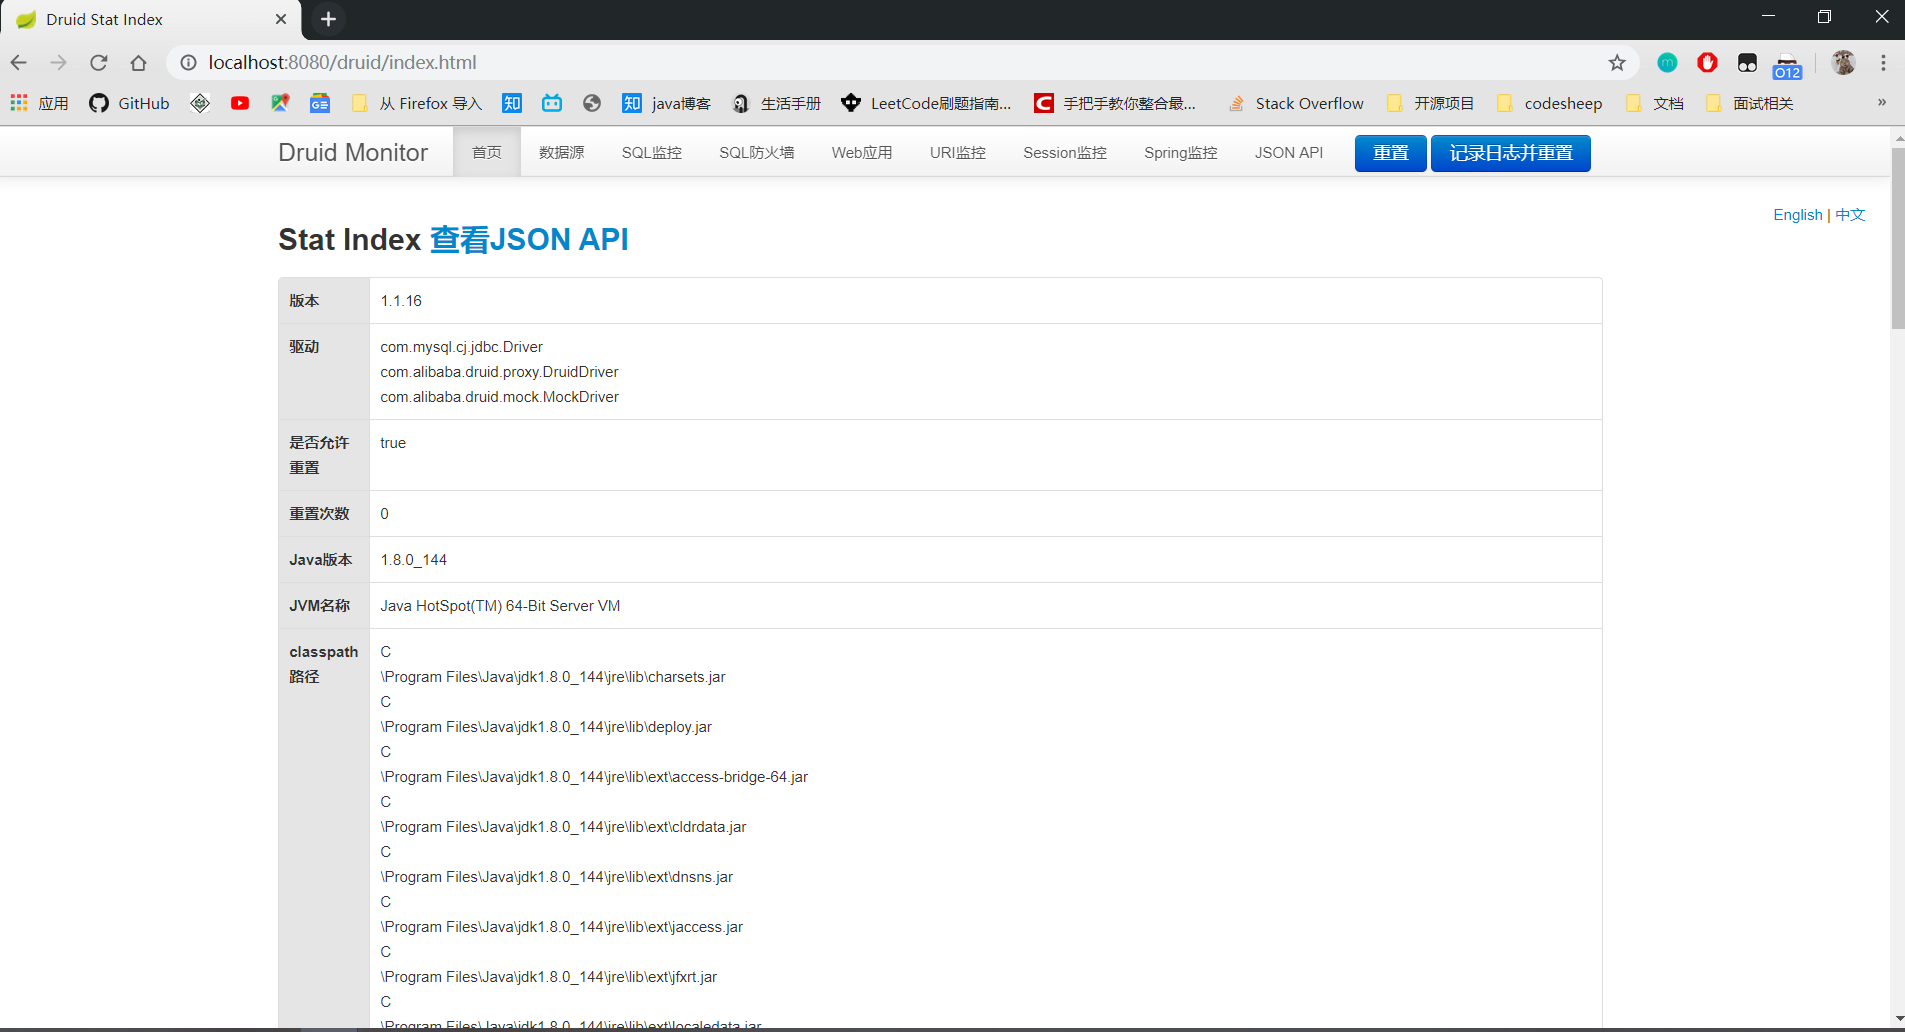
查看效果:
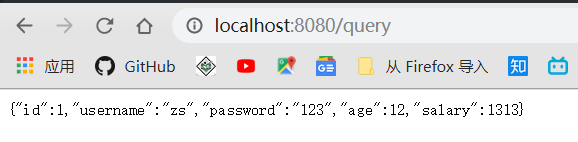
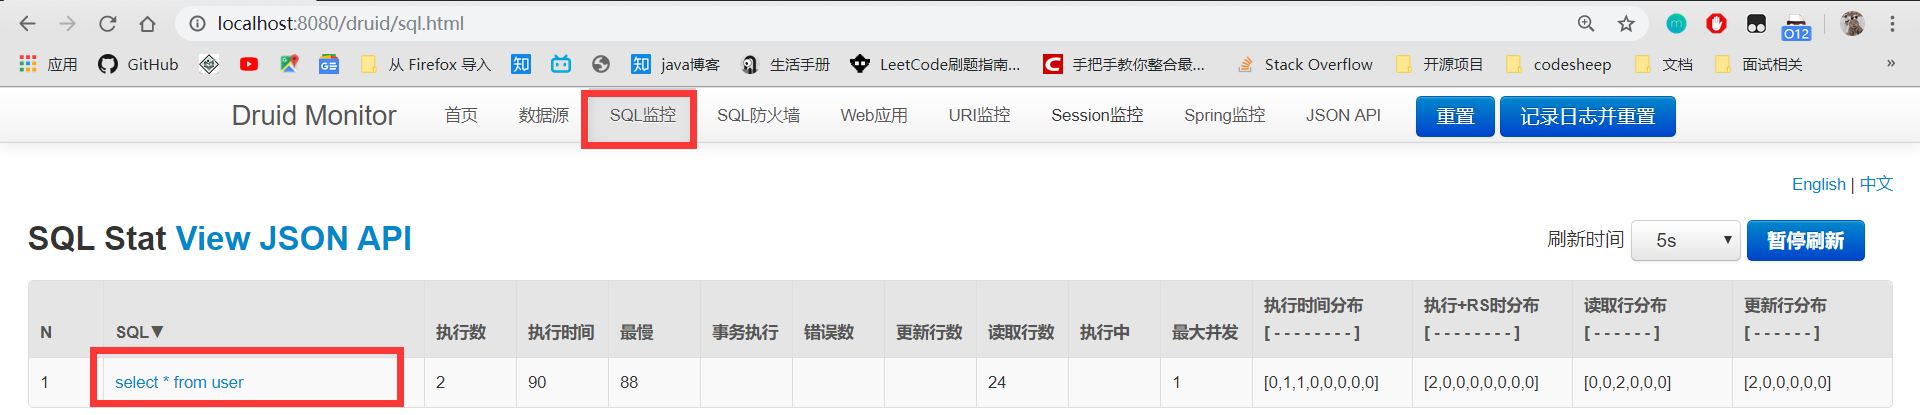
为了查看以下我们的 SQL监控 的效果, 我们来写一个 controller :
1 2 3 4 5 6 7 8 9 10 11 12 13 14 15 16 17 18 19 20 21 22 23 24 25 package com.carson.springboot.controller;import org.springframework.beans.factory.annotation.Autowired;import org.springframework.jdbc.core.JdbcTemplate;import org.springframework.stereotype.Controller;import org.springframework.web.bind.annotation.GetMapping;import org.springframework.web.bind.annotation.ResponseBody;import java.util.List;import java.util.Map;@Controller public class HelloController @Autowired JdbcTemplate jdbcTemplate; @ResponseBody @GetMapping public Map<String, Object> map () List<Map<String, Object>> list = jdbcTemplate.queryForList("select * from user " ); return list.get(0 ); } }
并且向网页发送 query 请求:
然后查看 SQL 监控:
END~~