


开发环境:
- win10
- jdk1.8
- idea2019
- maven 3.2.5
- Spring Boot v2.1.5.RELEASE (版本)
1. yml文件的语法概览:
1 | |
2. @Value获取值和 @ConfigurationProperties获取值比较
| @ConfigurationProperties | @Value | |
|---|---|---|
| 功能 | 批量注入配置文件中的属性 | 一个个指定 |
| 松散绑定(松散语法)大小写 | 支持 | 不支持 |
| SpEL表达式 | 不支持 | 支持 |
| JSR303数据校验 | 支持 | 不支持 |
| 复杂类型封装 | 支持 | 不支持 |
这两种方式都能获取值:
- 如果,我们只是在某个业务逻辑中需要获取一下配置文件中的某项值,使用@Value
- 如果,我们专门编写了一个javaBean来和配置文件进行映射;@ConfigurationProperties
@Validated
@Value
1 | @Getter@Setter |
3. @PropertySource&@ImportResource
因为 @ConfigurationProperties 是全局注解,如果想指定的话
- @PropertySource:可以指定某个文件 @PropertySource(“classpath: xxx.properties)
@ImportResource: 导入Spring配置文件,让配置文件里面的内容生效
- 创建一个HelloService 类
- 如果没有注解情况下
1 | <?xml version="1.0" encoding="UTF-8"?> |
1 | @Autowired |
false 说明Spring Boot 里面没有Spring的配置文件,我们自己编写的配置文件,也不能自动识别
如果想让Spring的配置文件生效,加载进来; 就 把@ImportResource标注在一个配置类上
- 主类
1 | @ImportResource(locations = {"classpath:beans.xml"}) |
1 | @Autowired |
SpringBoot推荐给容器中添加组件的方式:
使用 @Bean
- 1, 配置类======Spring配置文件
- 建一个包 config,专门放配置类:MyAppConfig
1
2
3
4
5
6
7
8
9
10
11
12
13
14
15
/**
 * @Configuration: 指明当前类是一个配置类;就是来代替之前的Spring配置文件
 *
 * 以前配置文件总 用 <bean></bean> 标签添加组件
 */
@Configuration
public class MyAppConfig {

    // 将方法的返回值添加到容器中,容器中这几个组件默认的id就是方法名
    @Bean
    public HelloService helloService(){
        return new HelloService();
    }
}
- 建一个包 config,专门放配置类:MyAppConfig
记得把之前主类的@ImportResource注解 去掉!
1 | 输出结果: |
也是 true
4. 配置文件里的 ${}
random随机数
1 | ${random.value} |
${} 获取 之前配置的值
1 | person: |
如果
1 | dog: |
如果lastNAME没有的话, 那就
1 | dog: |
5. Profile
5.1 多个Profile 文件
Profile是Spring对不同环境提供不同配置功能的支持,可以通过指定参数等方式快速切换环境
比如我配置3个端口,一个默认的,一个dev(开发),一个prod(测试)
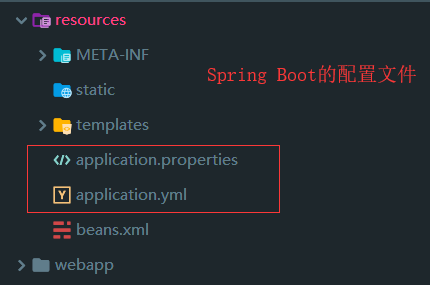
主配置文件名可以是 application.yml/application.properties
默认使用application.yml的配置;
5.2 yml的多文档块
以 — 分隔 文档快
1 | spring: |
- active:是指定哪个文档快
- profiles: 指定一个名称,让active识别的
5.3 激活指定profile
1, 在配置文件中指定 spring.profiles.active=dev
2, 命令行:
idea功能栏中的 run > edit > program arguments 添加上
–spring.profiles.active=prod
–spring.profiles.active=dev
3,cmd中 将 项目打成 jar包
java -jar (jar包名) –spring.profiles.active=prod
4, 虚拟机 参数:
idea功能栏中的 run > edit >VM options 添加上
-Dspring.profiles.active=prod/dev
6.Spring Boot配置文件的加载位置
Spring Boot 启动会扫描以下位置的application.yml或application.properties文件作为默认配置文件
- file: ./config/
- file: ./
- classpath: ./config/
- classpath: /
以上是按照优先级从高到低的顺序,所有的配置文件都会被加载,高优先级配置会覆盖 低优先级配置
file : 跟src平级的目录
classpath: resources目录下的
我们也可以通过配置spring.config.location来改变默认配置文件位置:
1.将项目打包
2.命令行格式: java -jar 包名 –spring.config.location= F:/app/application.properties(配置文件绝对路径)
项目打包之后可能后来会需要修改一些配置,就可以使用这种方式,并且旧配置还会存在,新配置也会应用上
7.外部配置加载顺序
SpringBoot也可以从以下位置加载配置,优先级从高到低,高优先级覆盖低优先级,如果有不同的配置,就会形成互补
命令行参数
java -jar xxx.jar –server.port=8081 –xxx
多个配置用空格分开: –xxx –xxx
来自java:comp/env的NDI属性
Java系统属性(System.getProperties())
操作系统环境变量
RandomValuePropertySource配置的random.*属性值
由jar包外向jar包内进行寻找:
优先加载带profile的
- jar包”外”部的application-{profile}.properties或application.yml(带spring.profile)的配置文件
- jar包’’内’’部的application-{profile}.properties或application.yml(带spring.profile)的配置文件
再来加载不带profile的
- jar包’’外’’部的application.properties或application.yml(不带spring.profile)的配置文件
- jar包’’内’’部的application.properties或application.yml(不带spring.profile)的配置文件
还有其他的:
- @Configuration注解类上的@PropertySource
通过SrpingApplication.setDefaultProperties指定默认属性
8.自动配置原理(重点)
自动配置到底能些什么?怎么写?自动配置原理:
查看目录最后一章 X. Appendices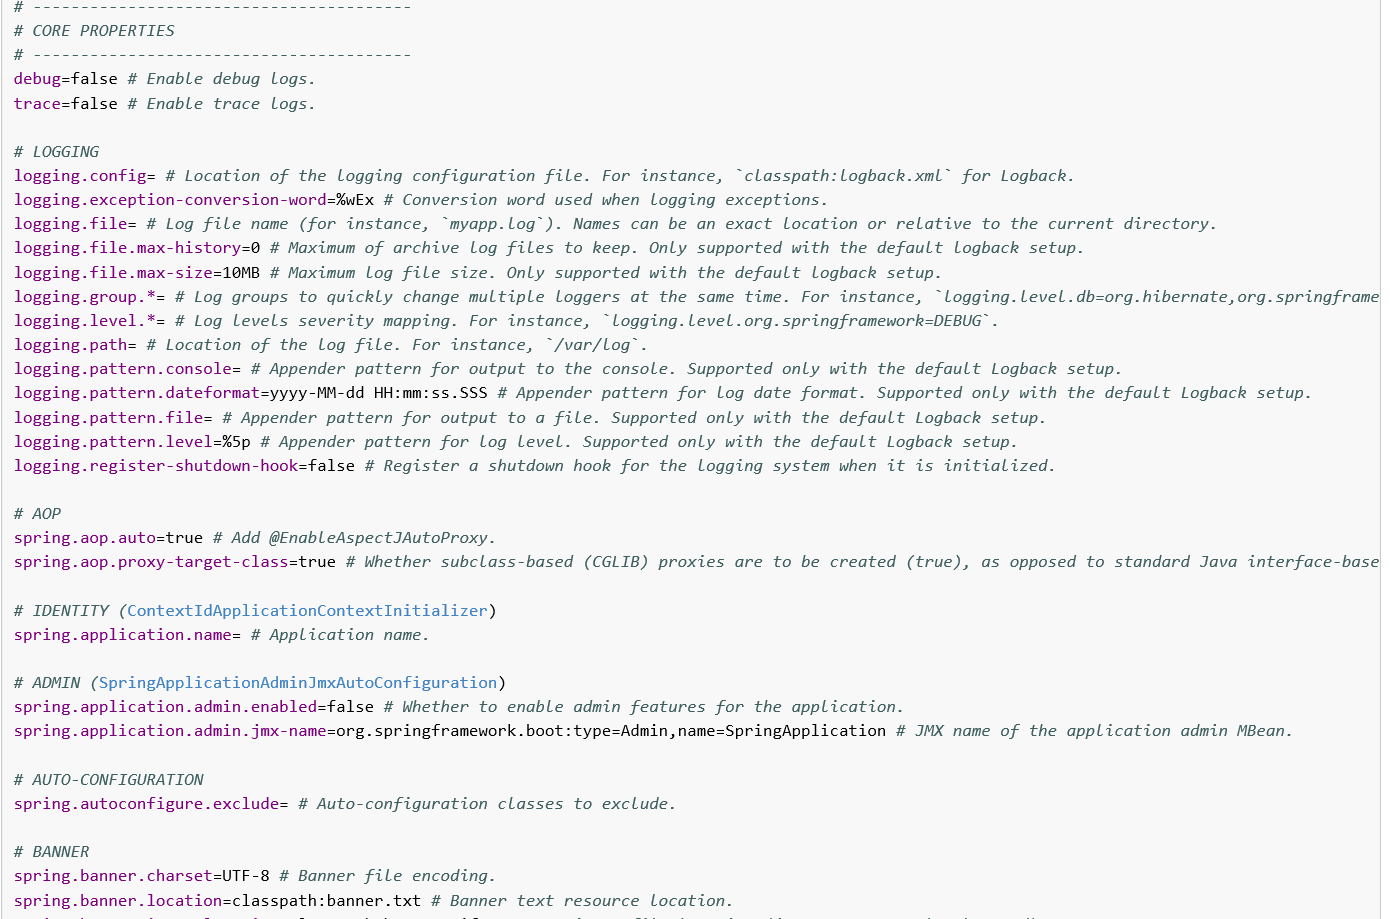
这里面说明了都有哪些配置项
其实:
- 1.SpringBoot启动会加载大量的自动配置类
- 2.我们看我们需要的功能有没有SpringBoot默认写好的自动配置类
- 3.我们再来看这个自动配置类到底配置了哪些组件(只要我们要用的组件有,我们就不需要再来配置了)
- 4.给容器中自动配置类添加组建的时候,会从properties类中获取某些属性,我们就可以在配置文件中指定这些属性的值
xxxxAutoConfigurartion: 自动配置类;
给容器中添加组件
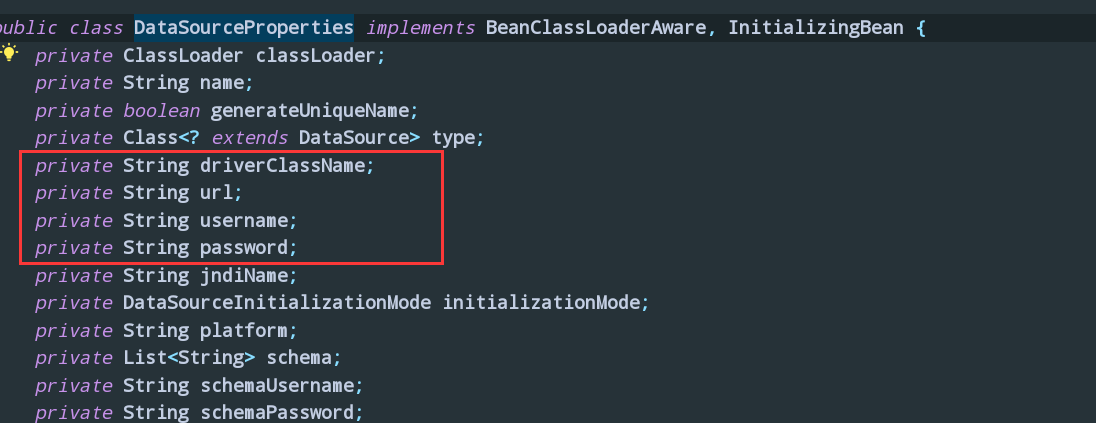
xxxxProperties:封装配置文件中相关属性;
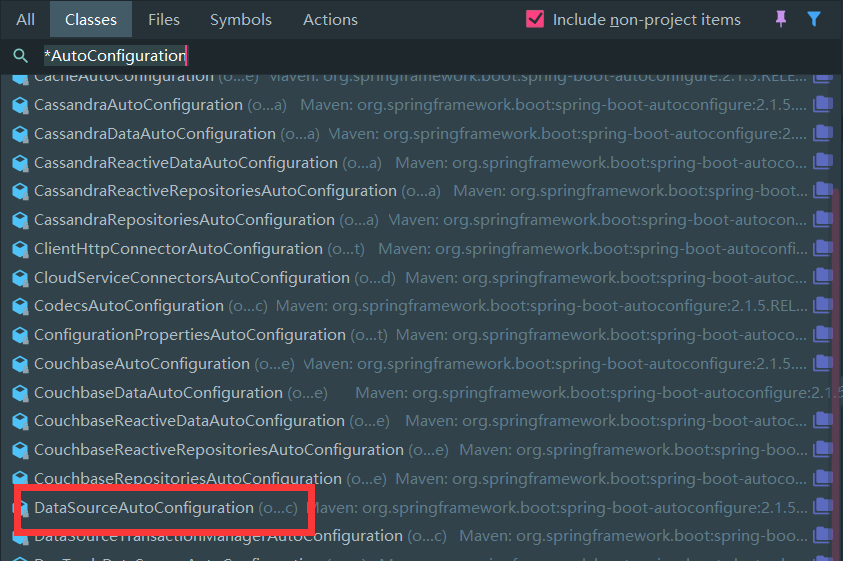
技巧:
idea双击Shift,搜索 *AutoConfiguration
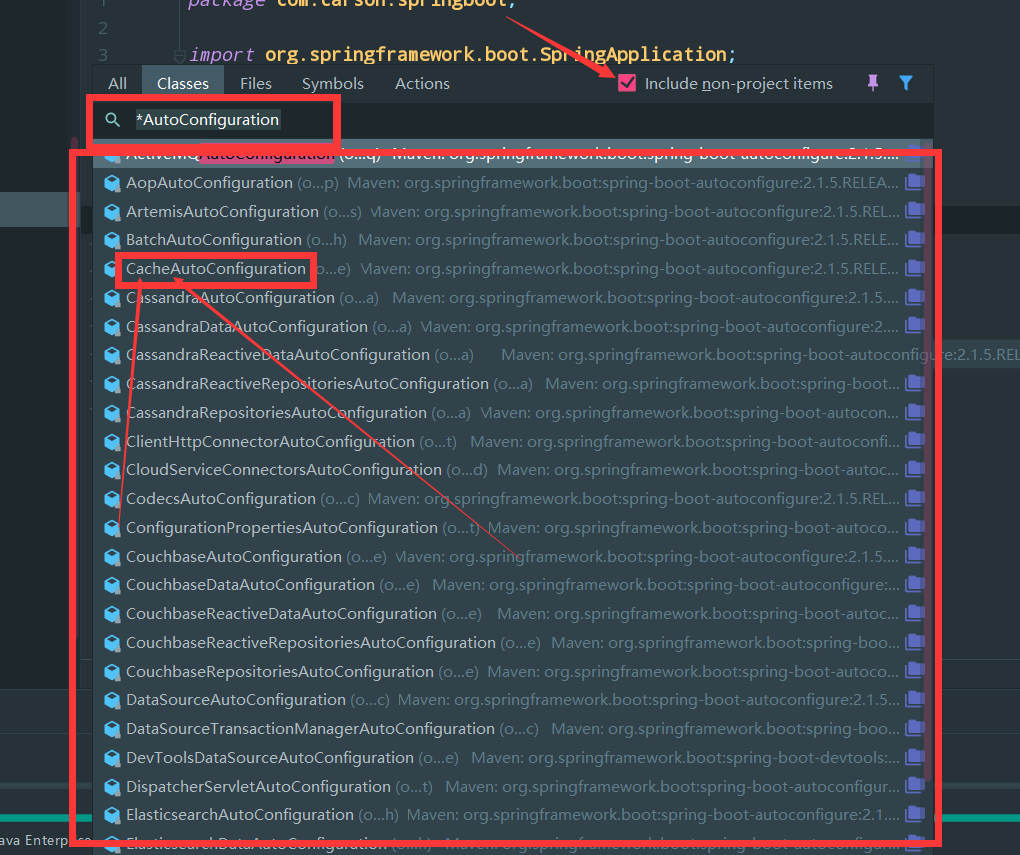
点开缓存相关的自动配置
我们将会看到以下源码:
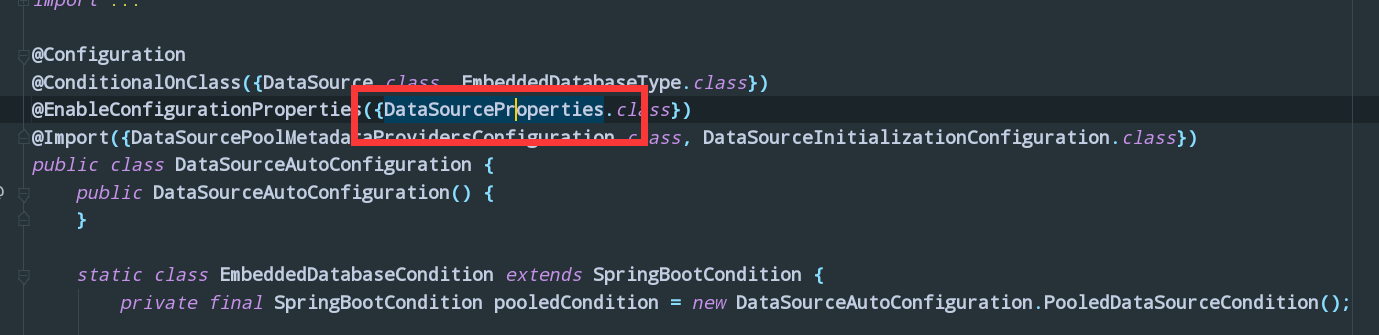
1 | @EnableConfigurationProperties({CacheProperties.class}) |
ctrl+鼠标左键点击:
1 | @EnableConfigurationProperties({CacheProperties.class}) |
我们会看到在CacheProperties类上:
1 | @ConfigurationProperties( |
prefix = “spring.cache” : 就是在yml/properties配置文件的语法前缀
至于能配置哪些具体东西?
就是这些
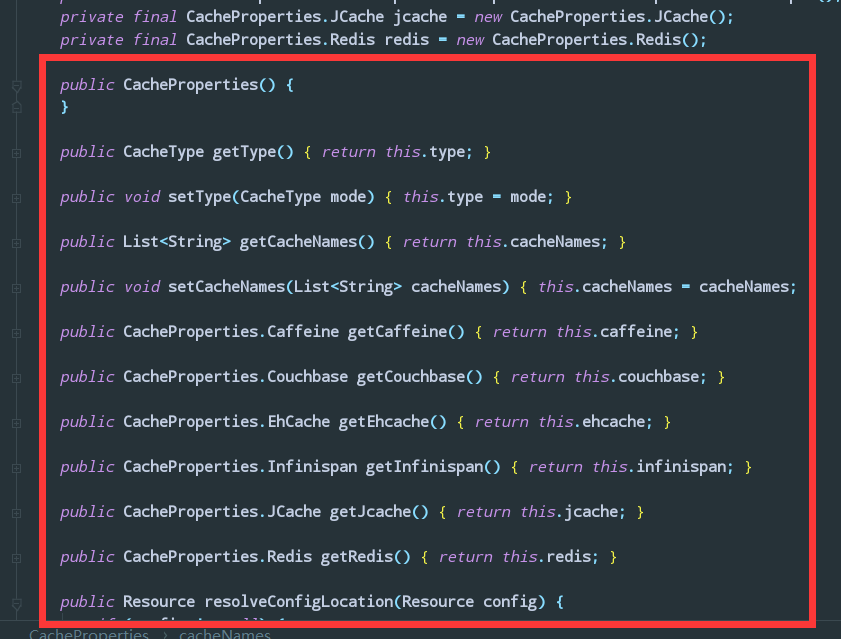
或者你可以利用idea的代码提示在配置文件里,比如我调用 第一个getType
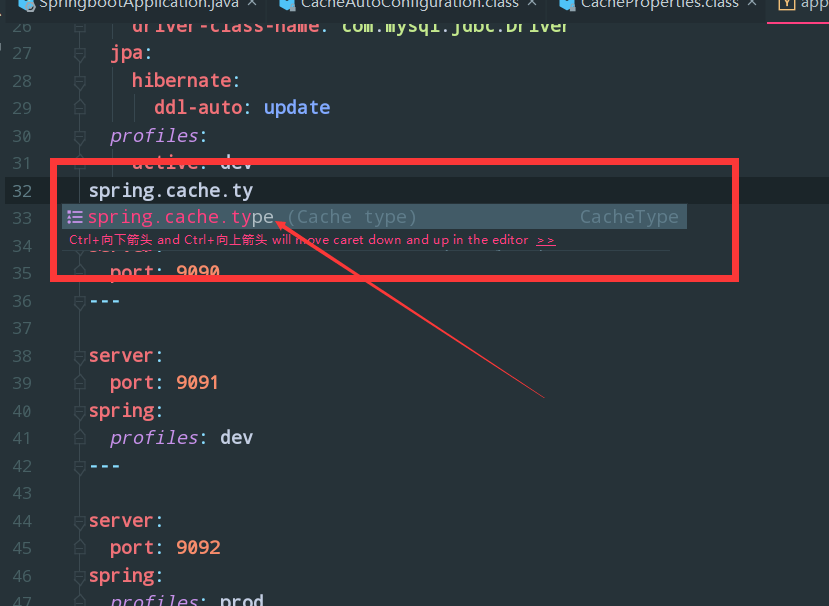
这就是通过源码的方式,来了解到我们可以在配置文件里配置什么东西
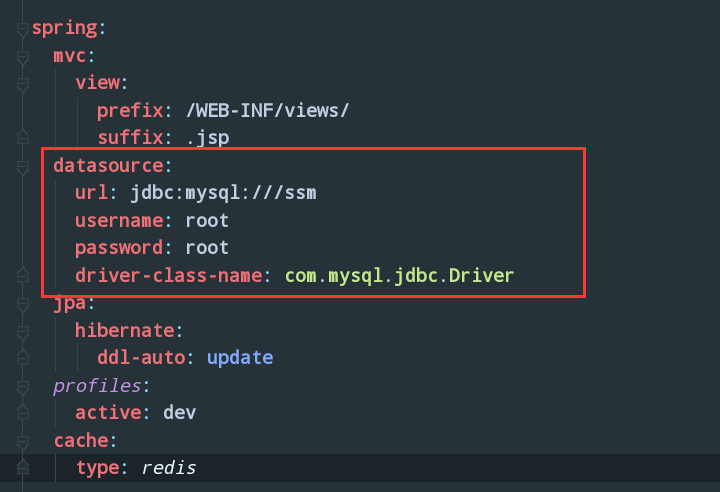
比如我想连接数据库,我来搜索一下
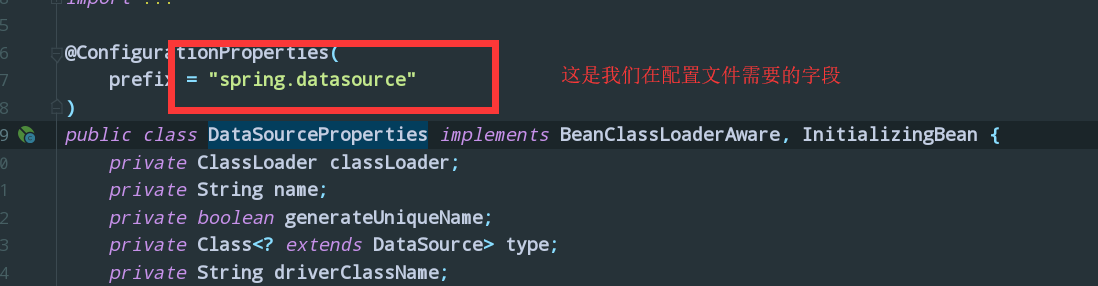
我看到了我们的需要的字段,以及下面很多的方法(这里就不截图了)
接下来就是到配置文件配置了:
9.细节
@Conditional派生注解

我发现源码中有很多的 @ConditionalOn***
它其实就是利用Spring底层的 @Conditional注解

作用: 必须是 @Conditional 指定的条件成立,才给容器中添加组件,配置类里面的内容才会生效,如果返回false那么,你配的东西都不会生效的
SpringBoot 扩展了 @Conditional注解 比如:
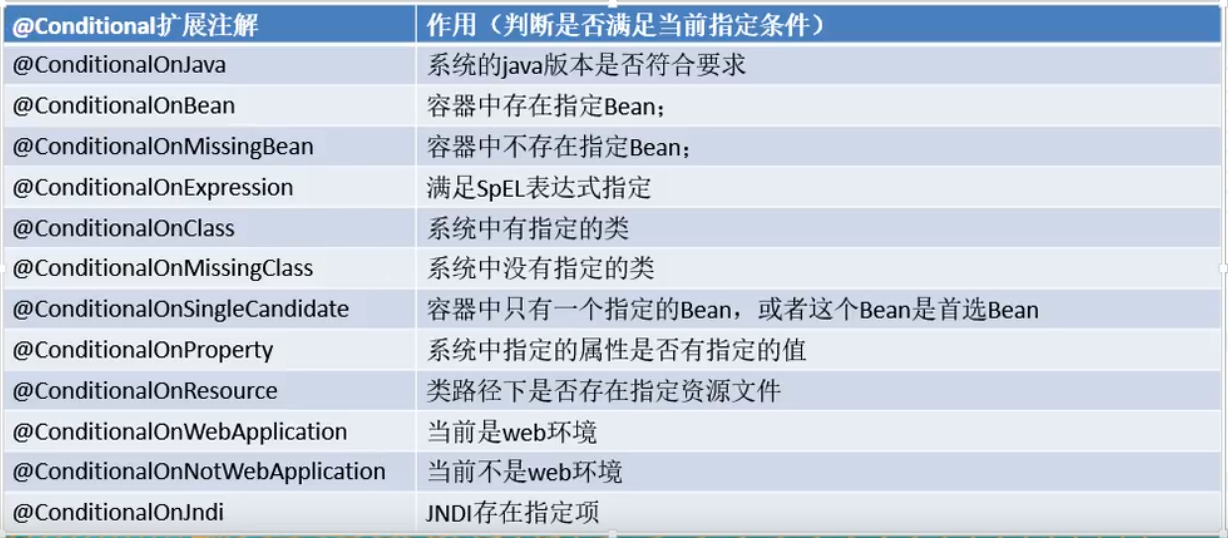
所以其实自动配置类必须在一定的条件下才能生效
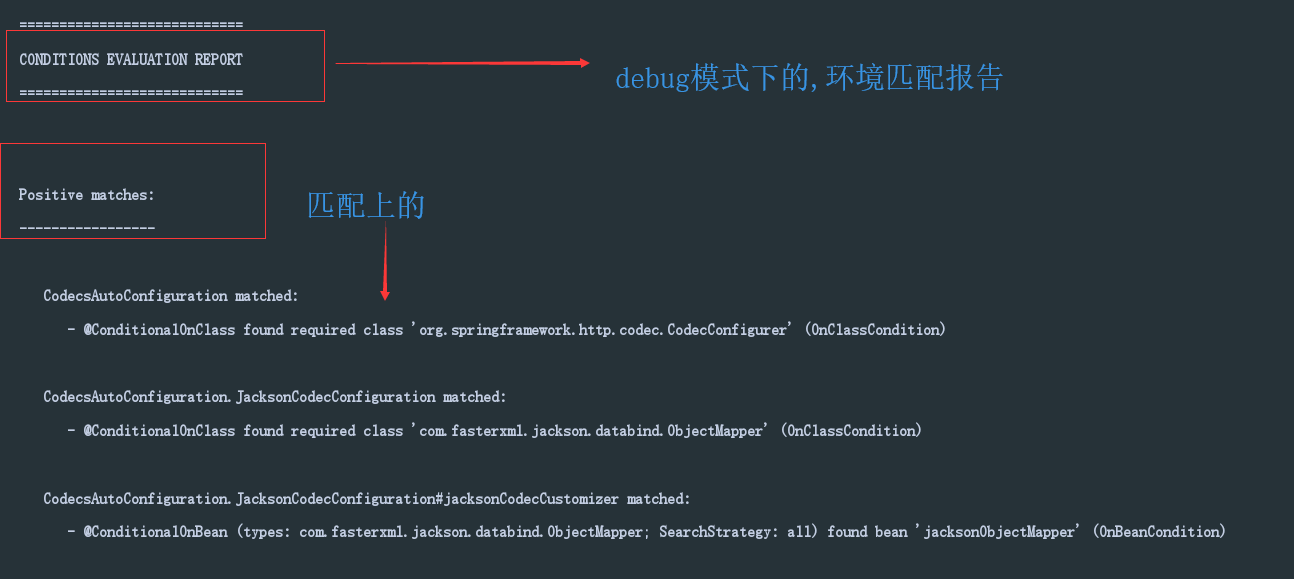
我们该怎么知道哪些类生效哪些没生效呢?很简单,在配置文件里添加:
1 | debug: true |
然后运行我们的朱类:
我们会看到:
还有:

都会在控制台打印输出